Archive for the ‘CLI’ Category


Creating a Basic CRUD Interface with Wheels 3.0

Accompanying Video

This blog post has an accompanying video posted to YouTube.

Welcome to the next installment in our Wheels 3.0 tutorial series! Today, we’ll guide you through creating a basic CRUD (Create, Read, Update, Delete) interface using the Wheels CLI. If you’re just joining us and don’t have the Wheels CLI installed yet, be sure to catch up with our previous video detailing the setup of your development environment.

Setting Up Your Wheels Project

To get started, we activate the `WHEELS NEW` command, which launches a wizard designed to help us build a new Wheels project efficiently. First, provide a name for your application—I’ll be using “myapp” as the demonstration name.

During the setup, you’ll be prompted to select which Wheels version to install, and we’ll choose the second option for Wheels 3.0. For development purposes, we’ll leave the reload password empty, but remember to set a secure password before moving to production. Next, the wizard will ask for a datasource name, which defaults to our application name and suits our needs.

You’ll then be asked to select a CFML engine for deployment, and we’ll stick with the default, the latest version of Lucee. Since we opted for the Lucee engine, it offers the use of a built-in H2 database—a great development option that avoids setting up a separate database server. We’ll go ahead and select “yes” to use it.

You’ll have the option to include the Bootstrap CSS framework to enhance the appearance of your app. Finally, decide whether you want a box.json file for uploading the project to Forgebox.io. For this project, I’ll choose “no.”

After confirming our settings, the wizard will download the specified 3.0 template, along with any necessary dependencies, setup the H2 database, integrate Bootstrap, and start the server. Once the installation is complete, we can explore what’s been set up.

Exploring the CLI Setup

The CLI generates a default Wheels installation skeleton, which it modifies based on our inputs, such as updating configuration files and creating essentials like the URL rewrite file and a server.json file.

Upon successful installation, the confirmation screen assures us with a set of configurations displayed on the Info tab. This includes details like application and datasource names, and confirms the H2 database driver installation with the ready-to-use datasource.

Creating a User Model

Now, it’s time to create users through the CLI. In CommandBox, we use the `wheels scaffold` command to begin creating a User model. We’ll bypass the database migration initially but note how this step has generated skeleton view files, a model file, and a controller in the app. This default setup is crucial for the business logic and user interactions.

To give the user model some structure, we use the command line to add properties like first name, last name, and email to the User model, although we’ll skip database migrations for these incremental property additions.

Consolidating Migration Files

Before executing database migrations, it’s wise to consolidate the migration files generated. Inside the app’s migrator/migrations folder are several CFC files. We aim to merge these into a single file, ensuring the `up` and `down` functions are properly matched—creating a table in `up` and dropping it in `down`.

Once consolidated, enhance the migration script by adding string-based columns for first and last names with a character limit, and a longer limit for emails, ensuring database integrity and conformity.

Running Migrations

Migrations can be executed via the CLI or the application’s user interface. Using the UI, navigate to the Migrator tab and run the migrations in sequence or opt for ‘Migrate to Latest’ to process all migrations.

Given that model configurations are cached, reload the application post-migration to let the framework update model configurations based on new database structures.

Finalizing the Application

Lastly, make the User index the default application page rather than the Congratulations page. Modify the routes.cfm file to direct URLs to the users index route by default. Reload the application to apply this routing change, and upon revisiting the default route, the Users page should now load by default.

This tutorial concludes our hands-on exploration of CRUD interface creation in Wheels 3.0 using CLI. We covered project setup, database configuration, scaffolding models, property additions, migration management, and front-end interfacing—all culminating in a functional application displaying user data.

Wheels 3.0: Setting Up Your Development Environment

Accompanying Video

This blog post has an accompanying video posted to YouTube.

Introduction

The forthcoming release of the Wheels 3.0 framework is creating waves in the development community, promising transformative enhancements and simplified workflows. In this blog post, we will focus on establishing the foundational environment crucial for executing Wheels projects efficiently. We’ll guide you through project creation using both the current and the upcoming 3.0 versions of the framework and will explore the differences in their directory structures. Let’s dive right in!

Installing CommandBox

The cornerstone of our setup is CommandBox, a versatile tool that modernizes the CFML developer’s workflow. CommandBox serves as a command line shell, a package manager, and a seamless interface to start a CFML engine in any given directory, without the need to juggle complex application server installations. CommandBox is accessible for Mac, Windows, and Linux OS, with installation methods varying accordingly. For Mac users like me, Homebrew is the chosen method for installation, while Windows users can turn to Chocolaty or a native installer, and Linux enthusiasts can rely on built-in package managers.

CommandBox and Wheels CLI Setup

Once CommandBox is installed, jump into the CommandBox shell via the `BOX` command in the terminal window. Note that the first launch involves downloading several packages which could take some time. Following the setup, install the Wheels CLI commands into CommandBox using `INSTALL WHEELS-CLI`. Although I’ve already completed this step earlier, executing this ensures you are equipped with the right tools to proceed.

Creating Projects with Wheels

With CommandBox ready, embark on creating two projects using the `WHEELS NEW` command. This command initiates a wizard that will actively guide you through the process of setting up a new Wheels project.

1. Creating a Current Version Project

  • Naming the Project: First, supply a name for the project, for instance, “CURRENT”, which creates a directory embodying the project files.
  • Template Selection: Choose the template corresponding to the current version and proceed with the default options.
  • Project Initialization: Conclude the process with a “Yes” to affirm configuration and initiate project setup. The CLI will create the project directory and integrate necessary files. Launch the server with `START` and witness the “Congratulations” page, assuring correct installation.

2. Creating a Wheels 3.0 Version Project

  • Naming the Project: Again, deploy `WHEELS NEW` to name your project.
  • Template Selection: This time, select the “Bleeding Edge” template for a Wheels 3.0 implementation. Confirm defaults and proceed to build your project.
  • Project Initialization: Use the `START` command to usher in a new CFML application server, culminating in a fresh “Congratulations” page highlighting the new branding and 3.0 framework base.

Exploring Directory Structures

A crucial step is to delve into the structural differences between the two projects:

  • Current Version: This project exhibits a larger assortment of directories and files at its root, which poses an increased potential attack surface.
  • Wheels 3.0: The new framework refines this exposure significantly, only housing four directories at the root. Key directories like config, controllers, and views reside under the `app` directory, while static resources like images and stylesheets find home under the `public` directory. The `vendor` directory now accommodates core framework files, enhancing security by mapping only the public folder to the webroot of the application server.

Conclusion

Setting up an environment for Wheels 3.0 marks the beginning of an exciting journey in CFML development. From installing CommandBox to exploring framework nuances, we have geared up for advanced Wheels projects.

Wheels CLI matures to Version 1.0

It’s hard to believe it took so long to get here but modern CFML development has come a long way thanks to tools like CommandBox and ForgeBox. The Wheels CLI is built as a CommandBox module and wouldn’t have even been possible without the support of the fine folks at Ortus Solutions.

The first commit to the repo for this project was committed back in July of 2016. It’s taken a while, that’s an understatement, to get here but Wheels itself jumped to 2.0, CommandBox matured, and we were able to put the plumbing in place to support the communication between the CLI and the running server. With nearly 300 commits in the repo, 25 commands in the CLI, and over 20 pages of documentation, it’s now time to take the alpha/beta label off send this baby out into the world.

Some of the more notable commands are wheels new to use our wizard to start a brand new project. With this command and the corresponding wheels generate app command, you can start a new Wheels project in a directory, specify the template to use, pick the CF engine to use, configure the datasource, and setup your reload password. In fact there’s a whole host of generate commands for every type of object you may want to create. There are a bunch of dbmigrate commands to interact with database migrations.

To install the CLI issue the following command:

box install cfwheels-cli

Don’t forget to check out the full CLI Commands section in the guides too.

CFWheels DotEnvSettings Plugin published

A new plugin was published to provide support for .env settings files in a production environment. This plugin is based on Eric Peterson’s CommandBox module and allows the use of .env or similarly named files to store your application secrets so they can be kept out of source control.

LICENSE

Apache License, Version 2.0.

SYSTEM REQUIREMENTS

  • Lucee 5+
  • ColdFusion 9+
  • CFWheels 2+

Instructions

Just drop the zip file into your plugins folder and restart your application or use CommandBox cli to install. Simply type the following at the root of your project:

box install cfwheels-dotenvsettings

Usage

Create a .env file in your project root and add to .gitignore or your version control’s equivalent (don’t commit secrets to your repo!) The file can contain JSON or Java properties style key value pairs:

// property style
MY_SECRET_KEY=somevalue
MY_OTHER_SECRET=shh

// json style
{
  "MY_SECRET_KEY"="somevalue"
 ,"MY_OTHER_SECRET"="shh"
};

The default file name supported is .env but you can use any file name you want. You could even have multiple files for various environment.

In your CFWheels app you can read in your secrets by adding readDotEnvSettings() to your application. The most logical point to do this would be in your events\onApplicationStart.cfm file, but you could do it in your environment specific settings.cfm files as well. You can then access the secrets contained in the file processed using get("MY_SECRET_KEY").

If you want to customize the secrets file to use, you can specify the file name by passing in the file name like so readDotEnvSettings(".env-second").

CFWheels Fully Embraces ForgeBox Packages

As you may know, many years ago CFWheels embraced the distribution of Plugins via ForgeBox packages instead of maintaining our own directory. But the framework itself remains illusive. There was some work done in the last few months to put up packages for the framework but those packages were being maintained by hand which made them a show stopper for a long term solution.

Well, thanks to a new CI workflow based on GitHub Actions we now have the building and publishing of the packages fully automated. Giving credit where credit is due, the new workflow borrows heavily from the ColdBox workflow. It used GitHub Actions, Ant, and CommandBox to automate the process.

So what does all this mean for you, let’s cut to the chase. This means you can now install a fresh copy of the framework using the following command:

box install cfwheels-base-template

This will pull down a copy of the latest stable release of the template files and then pull down a copy of the latest stable release of the framework via package dependencies. In fact the CI workflow mentioned about publishes two packages cfwheels which is the core framework directory and cfwheels-base-template which is all the other files you need to scaffold the framework.

We’ve even backfilled all the prior released versions of the framework all the way back to version 1.0.0. So you can install a particular version of the framework using the following command:

box install [email protected]

In addition you can install the bleeding edge which includes all the work in process towards the next major release using:

box install cfwheels-base-template@be

And if you ever just need to get a copy of the latest framework files simply use the following command:

box install cfwheels

All this means that upgrading to a newer version of the framework should be much easier going forward. Frankly you should just need to modify the version of the dependency in the box.json file and issue a box update command. But we’ll document that more fully when we make our next release.

For now please feel free to play with all this package goodness and let us know if we fumbled anything.

Starting a New CFWheels Project with the CLI

If you’re not using CommandBox for your CFWheels development, you’re in for a treat. This is a quick post to show case how easy it is to start a new CFWheels project with the help of the the wheels command for CommandBox.

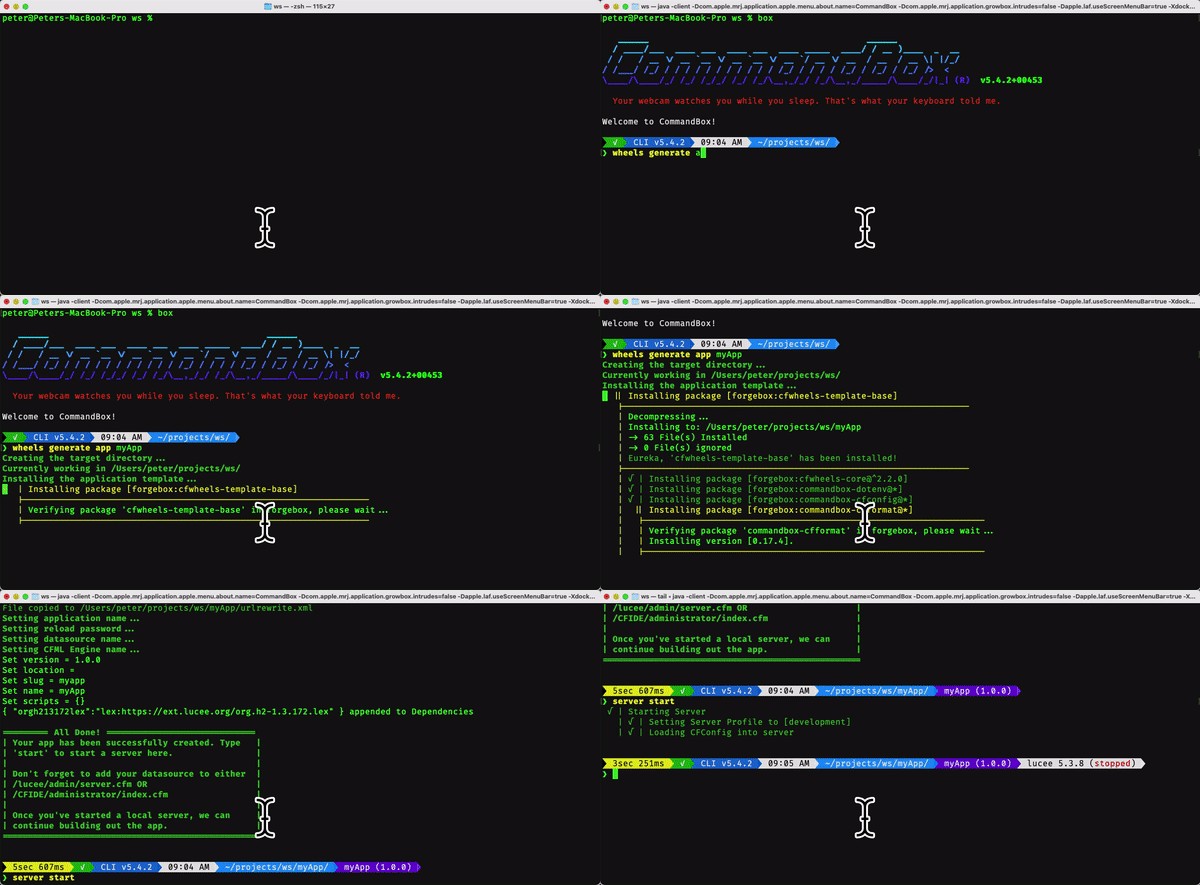
If you have CommandBox installed and have the cfwheels-cli module installed, then simply launch CommandBox by typing box and then issue the command wheels generate app myApp . This simple command will take care of the following:

  • Create a folder in the current working directory for the project and name if myApp
  • Copy the cfwheels-template-base package from ForgeBox and expand it in the root of the myApp folder
  • Copy the cfwheels-core package from ForgeBox and expand it into the wheels folder in the root of the myApp folder
  • This command also takes care of naming your app myApp or whatever name you pass in

You may be asking yourself, what are all these packages you’re talking about? Well, we are starting to use the package management system provided by ForgeBox and CommandBox to make distribution of sample apps easier as well as installing and updating projects based on CFWheels. More to come on these topics later but this is just to whet your appetite.